

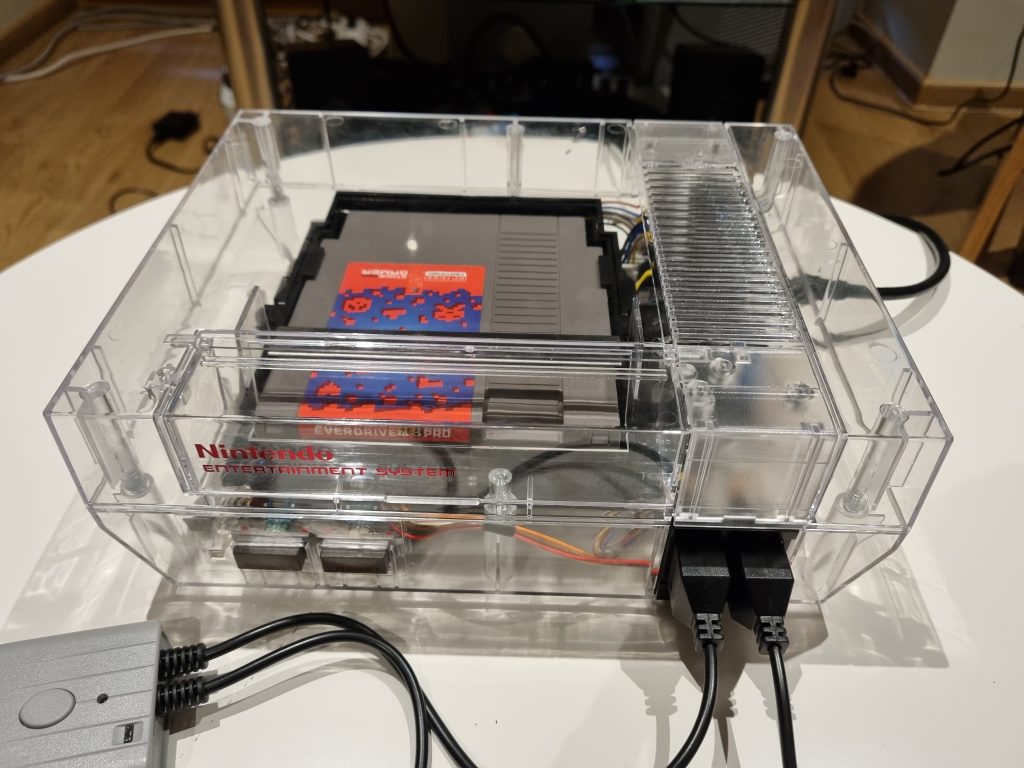
When I first saw the Necessity PCB for sale I was instantly intrigued by the prospect of building a NES console myself. Nevertheless the components sat in the box for a year until I got hands on it, because I wanted to finish with another project – Retro Chip Tester PRO, but this is story for another post. So I build myself a NES from new component, finished just in time for my birthday. Since we always make a playthrough of Contra as a tradition, this year we did this with hand made NES! So here is my thoughts and notes on this project, maybe it will be of help for somebody else building this.
First of all you should RTFM. Seriously it will save you the need to desolder stuff. You should read both Necessity and NESRGB documentation. However for soldering NESRGB you should look at pictures on Necessity page https://www.tindie.com/products/low_budget/nesessity-v16-replacement-pcb-for-nes-console/ , it’s pretty much all you need.

Even though it might look a good idea to use IC sockets, but if you are installing NESRGB mod its not an option since NESRGB PCB covers most of the IC’s and might just not fit. On the other hand if you are interested in composite video only, then go ahead and use socket for every IC.
Almost all components are THT, but there are like 4 SMT components. I’ve soldered SMT IC’s under the microscope since I have one, but they are large enough to do it by the eye. But to double check it’s nice to have at least a magnifying glass. Otherwise it’s not complicated at all, but takes time for sure. It is easy enough to find a place by value or component type. Just always double check, it will save you time.

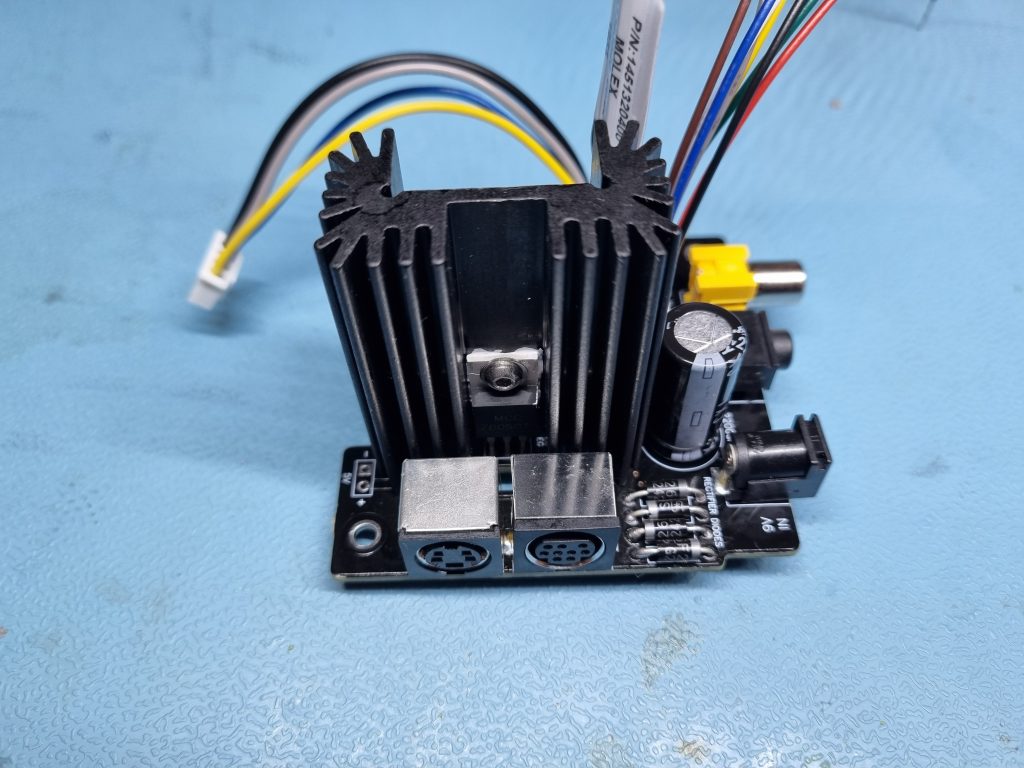
There are two PSU/AV boards for Necessity, they are not the same… Yes, I’ve managed to almost completely solder the composite video board. Good thing I have desoldering gun. After this project I just love it.
Desoldering CPU and PPU from donor console might be a nightmare without desoldering gun. Since I have one it was a breeze, I was actually laughing in amazement when I managed to pull out PPU at a first try.
Youtube videos seems pretty much useless and sometimes even confusing (they are using older boards and much more difficult installation). So at least for me it was waste of time to even watch those. Maybe for inspiration.
More scary was driving screws into acrylic case. I actually managed to break one screw (Made in China)! So try choosing quality screws for this. If using original case its not a problem of course. Also glueing a NES label was some task too. Soldering is the easy part.
EVERDRIVE N8 PRO is great, but don’t try to use SD card that is larger than 32GB it’s both a waste and a source of problems. It’s great that it also works with FDS (Famicom Disk System) games. Gives you ability to save games and more. Trully great addition.
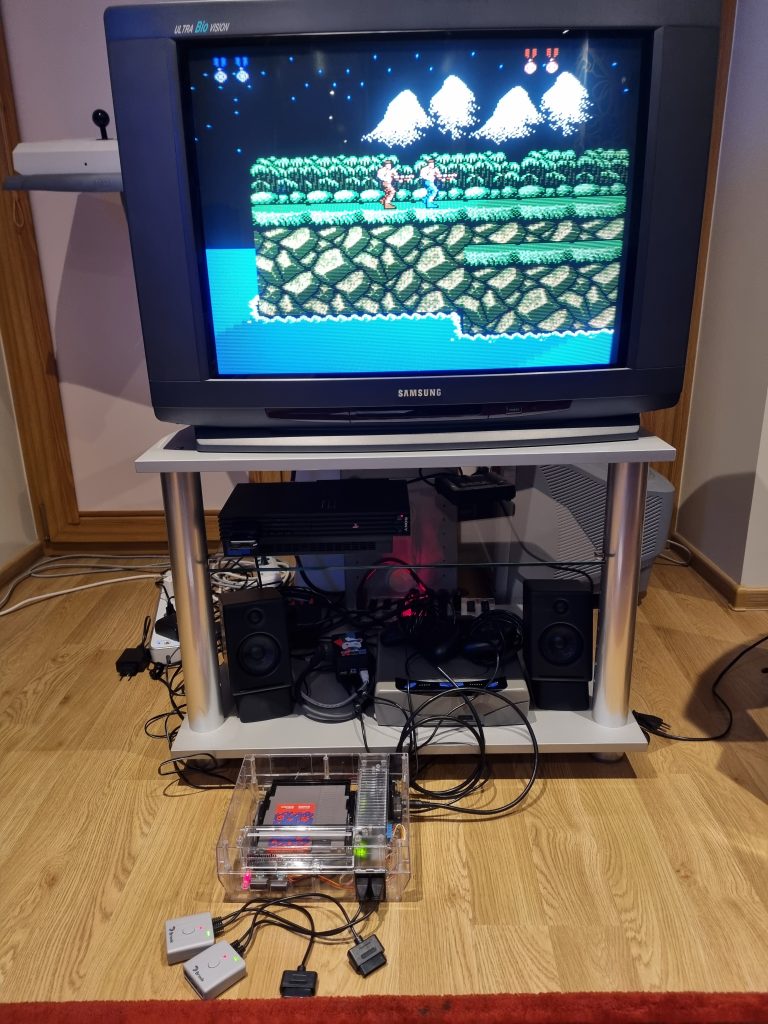
Brook controller adapters works perfectly with PS5 controllers. You can remap the buttons to your liking (for me this is an essential feature)! I’m becoming a big fan of Brook production.
Components used:
NESessity v1.5 Replacement PCB for NES Console – https://www.tindie.com/products/low_budget/nesessity-v16-replacement-pcb-for-nes-console/
RGB / S-Video upgrade for Nintendo NES – https://etim.net.au/nesrgb/
NES Transparent Shell – https://retrogamerestore.com/store/nes-shells/
EVERDRIVE N8 PRO – https://krikzz.com/our-products/cartridges/everdrive-n8-pro-72pin.html
Brook Wingman SNES – https://www.brookaccessory.com/products/wingmansnes/index.html